Enhanced "Move" Tools in RISAFloor
RISAFloor v11 includes the ability to re-position selected elements such...
Wall panels in RISA-3D let engineers design and analyze multiple structural systems in a single model. Correctly applying boundary conditions at wall panels is critical to accurately represent the structure’s behavior. This FAQ answers common questions about how to set up wall panel boundary conditions and how RISA-3D handles them in the analysis. How do I apply continuous boundary conditions along a wall panel edge? 1. Open the Wall Panel Editor Double click on the wall panel in the 3D view to open editor Use this editor to customize the wall panel including adding openings, changing materials, and assigning boundary conditions 2. Select Boundary Conditions Click the Boundary Conditions button in the upper left corner under the Walls tab Use one of the preset options as a starting point: Free, Fixed, Pinned, or Roller For custom restraints, set each degree of freedom (DOF) to Reaction or Free 3. Assign Boundary Condition at an edge Click on a snap point along the edge of the wall where you'd like to apply the boundary condition The boundary condition will be applied to the entire length of the edge selected Once assigned, the wall boundary condition will show in orange in the model…
Read More
RISAFloor v11 includes the ability to re-position selected elements such...
Now available in RISAFoundation v9 is the ability to design masonry...
In RISA-3D, RISAFloor, and RISAFoundation the cursor now provides...
In the RISA-3D when you model a WT brace it exists at the member centroid,...
RISAFloor v11 now includes the ability to create custom column strip...
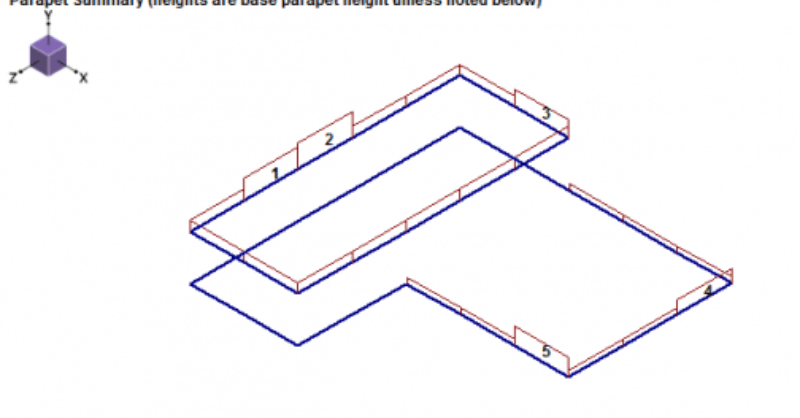
RISAFloor v11 now includes the option to add parapets and parapet loading...
Our monthly "Structural Moment" newsletter is the best way to keep up with RISA’s product updates, new releases, new features, training events, webinars and more...