


 By: Admin
How to Get a Code Check for Custom Cold Formed Steel Shapes
In order to get code calculations, RISA-3D and RISA-2D need to know...
There are multiple options in RISA-3D and RISAFloor to create a custom shape not available in the program databases. The first, is to utilize RISASection in order to create cross-sections, calculate section properties and import the shape directly into RISA-3D. For more information on integrating RISASection and RISA-3D, read the article below:

In addition to using RISASection, a custom shape can be added directly to RISA-3D. The type of shape you create depends on if you want a code check for your section or you’re more interested in the analysis only and don’t require a code check. The type of material and shape type is also a factor in how you create a custom shape. We will explore the available options below.
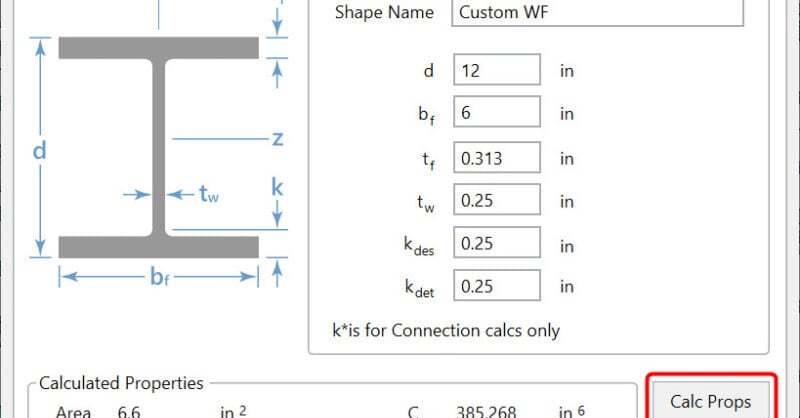
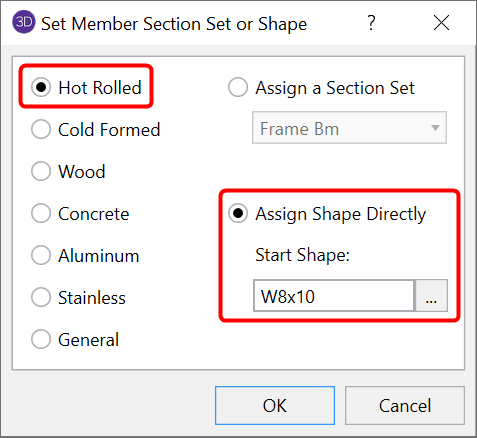
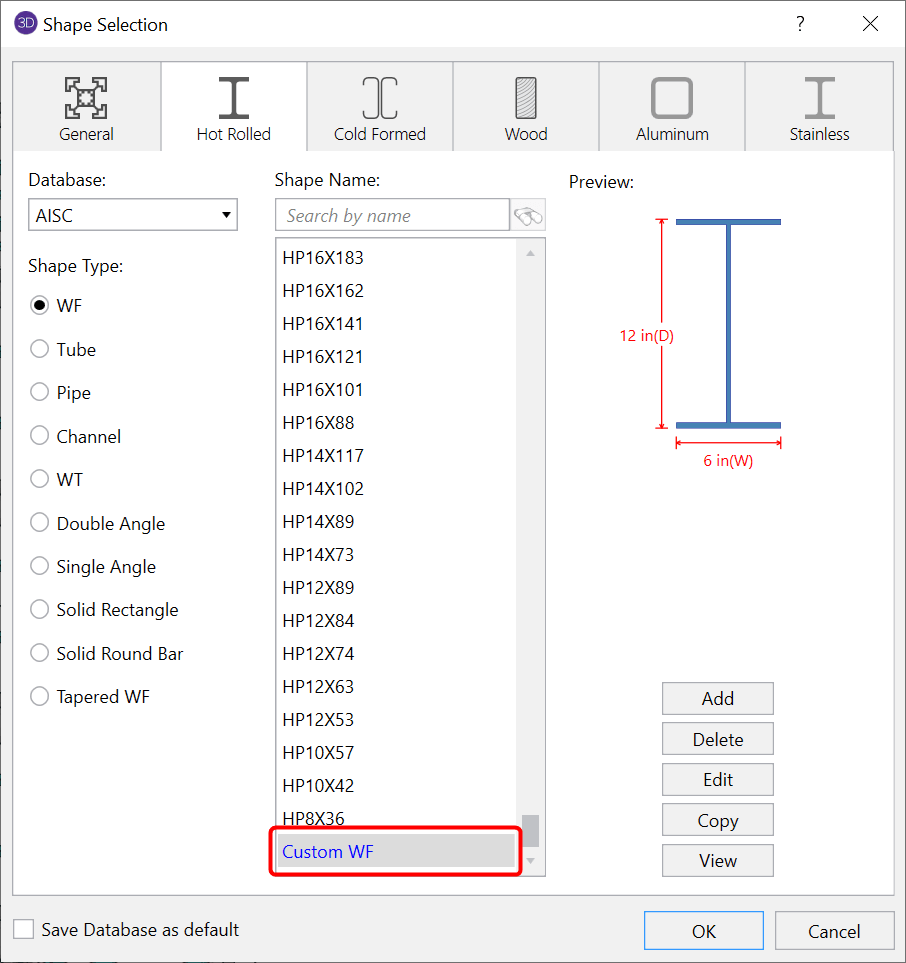
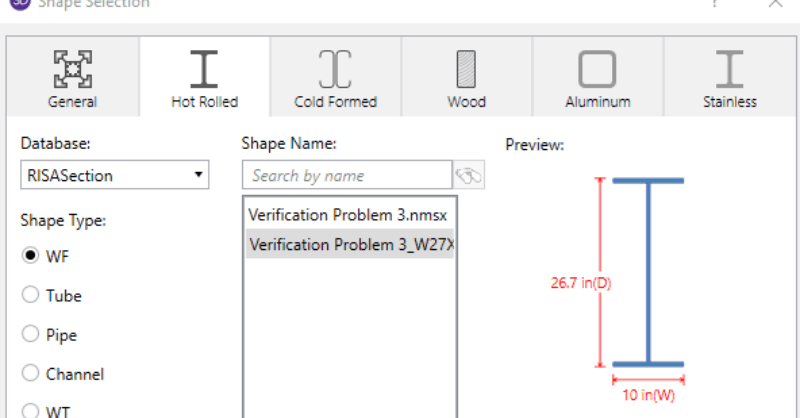
Perhaps you have a built-up section including a wide flange with a channel. You would like a code check on the section based on the wide-flange. Open up your shape selection dialog box from the Properties Panel and then choose Assign Shape Directly by clicking on the ellipsis button.
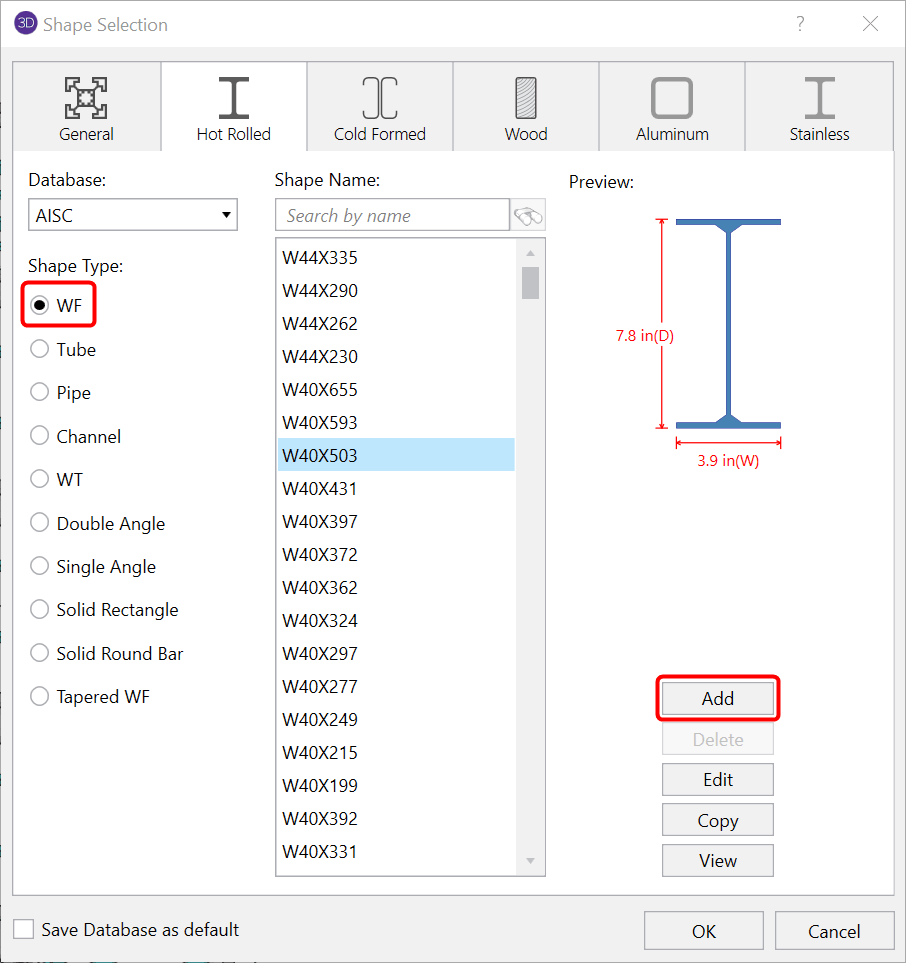
Once here, select WF and click Add.
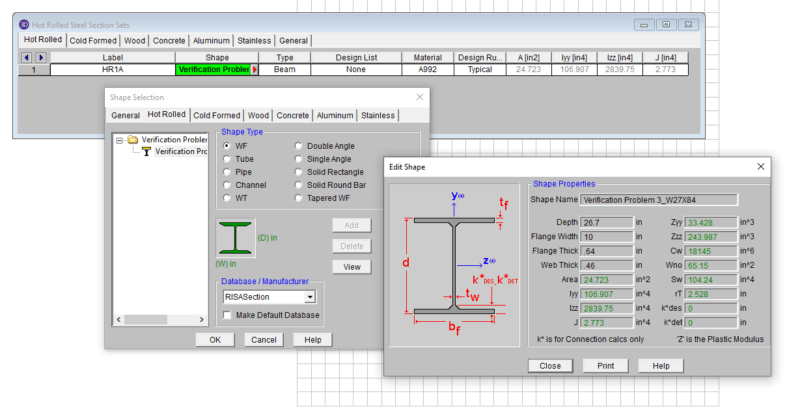
In the Add Shape dialog box that pops up, you will enter in the section properties and select Calc Props then OK.
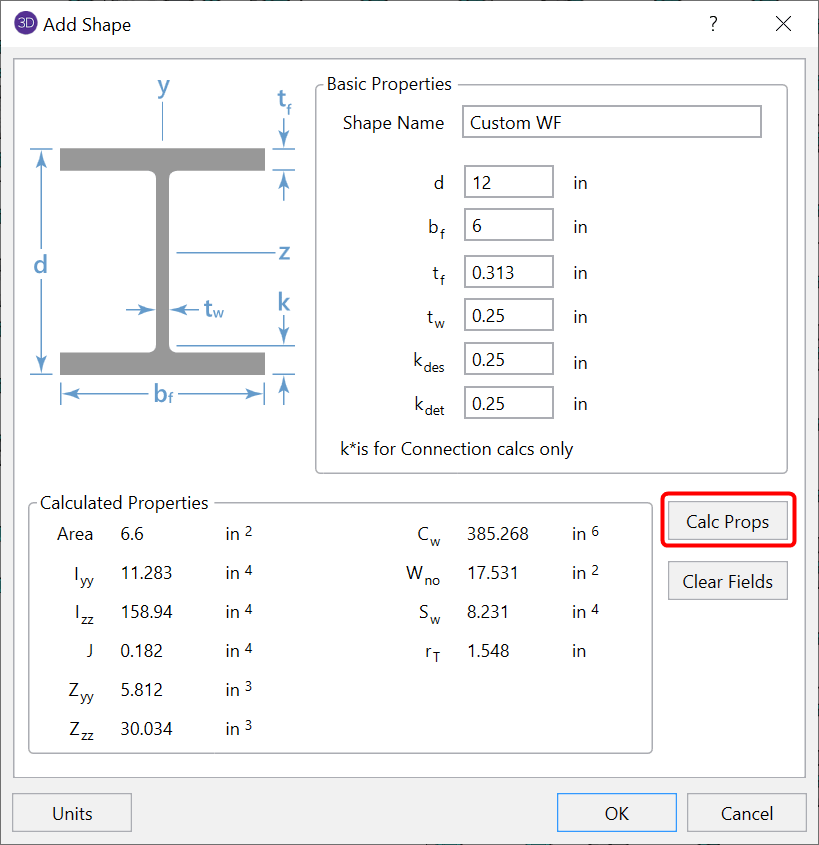
You will now notice at the bottom of the database shapes list, your custom shape will be available to use in your model. The code check will be based on a hot rolled WF since these are the selections we made previously.
In turn, if you would like to create a custom shape for a different section type and still receive a code check, simply make your selection under the Shape Type options (tube, pipe, etc.). If you have a different material other than hot-rolled (cold-formed, wood, etc.), the same process is followed under the applicable material tab.
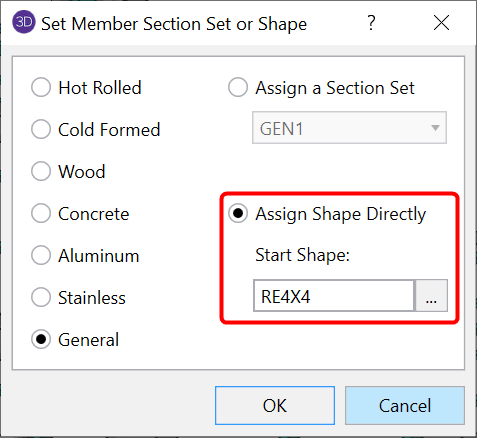
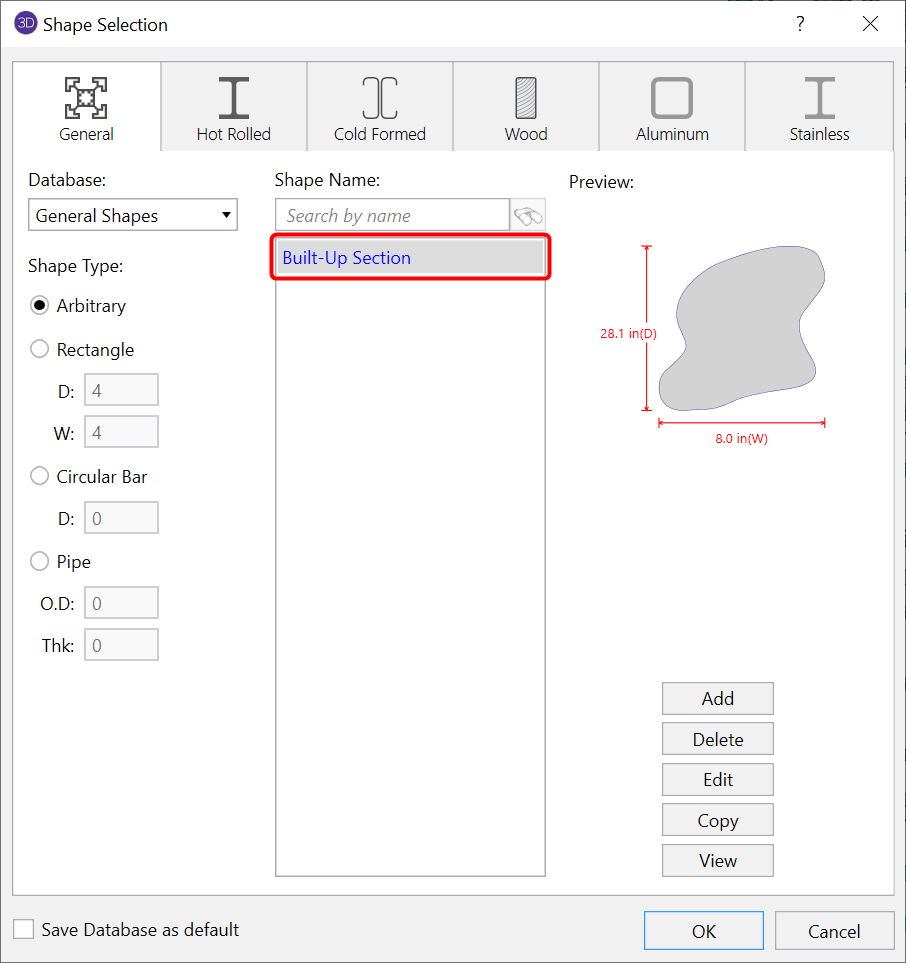
You may have a custom section that does not fit into any shape type category, and therefore you won’t be able to accurately get a code check. We suggest adding your custom shape as a general section. To do this, open up your shape selection dialog box from the Properties Panel, choose General and then choose Assign Shape Directly by clicking on the ellipsis button.
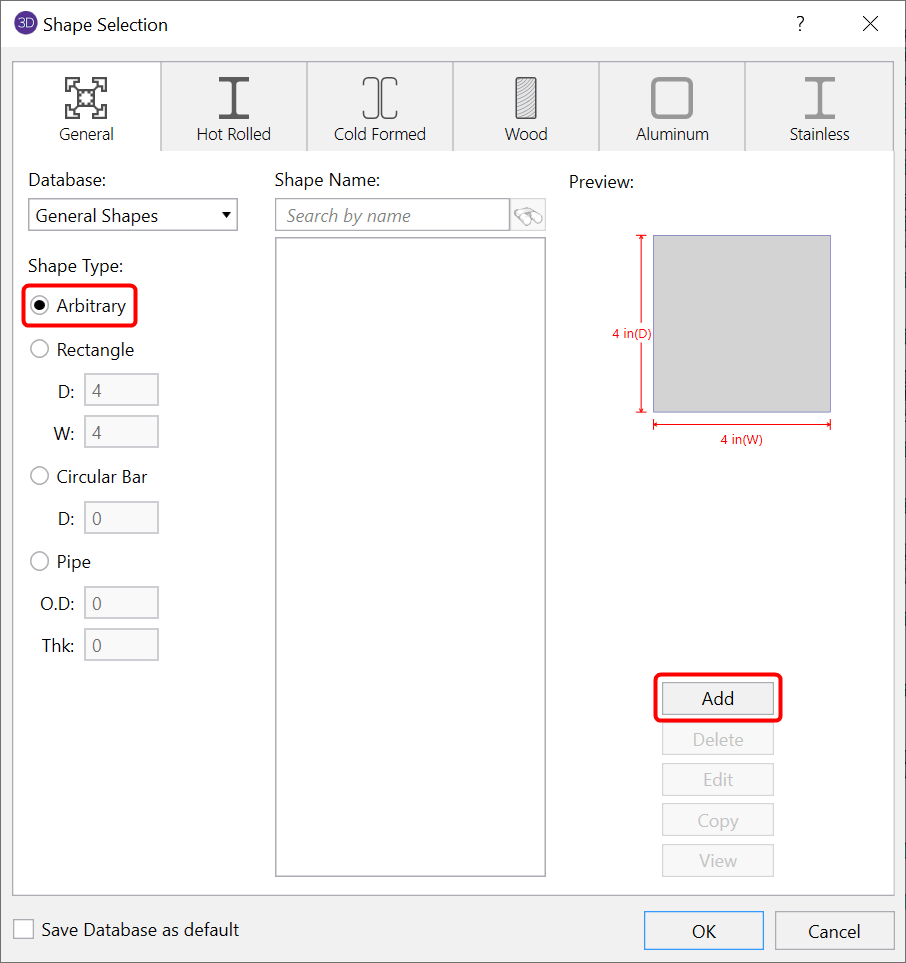
Once in the Shape Selection dialog box, you can select the applicable Shape Type. For this example we will choose Arbitrary and Add.
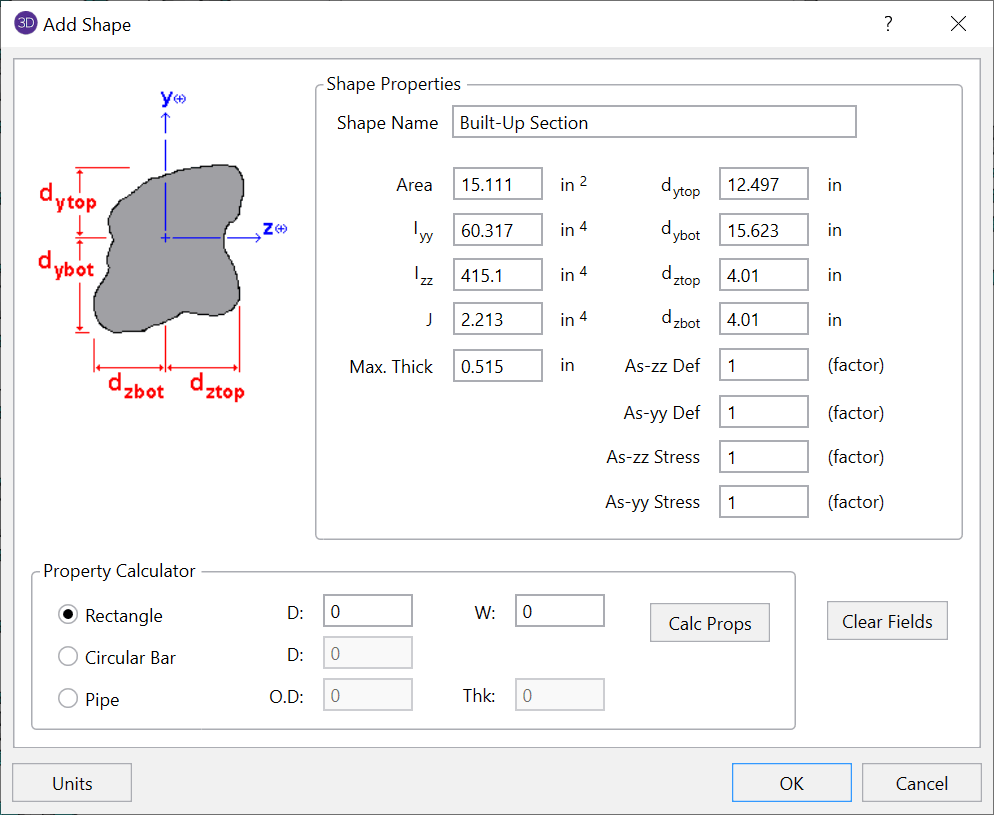
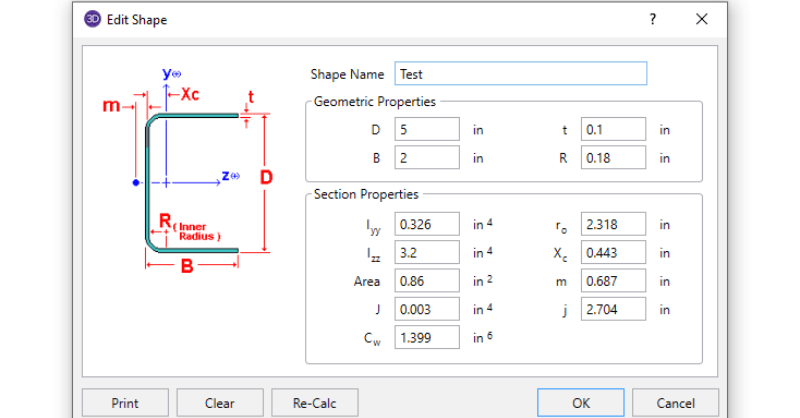
In the Add Shape dialog box you will enter in the custom shape properties and click OK.
The custom shape will now be available to use in the model.
With Option 2, an analysis will be performed on the member and you will be able to pull all information from the Results toolbar such as deflection, forces, etc. However, you will see an “N/C” for the code check for all general members.
In order to get code calculations, RISA-3D and RISA-2D need to know...
When using RISA Integration between RISASection and RISA-3D, RISA-2D...
Use RISASection to find the properties of built-up steel sections, then...