


What’s New with the RISA-Revit Link v24.0.2?
We're thrilled to announce the release of the RISA-Revit Link v24.0.2,...
Integrating structural models from RISA to Revit seamlessly can sometimes present challenges, especially when it comes to creating and reviewing your Revit analytical model accurately. In this support article, we'll delve into the process of modifying you Revit's graphical view of your Analytical model, allowing you to review the node connections prior to your export to RISA-3D or RISAFloor thus ensuring a smooth transition between the two platforms. Let's navigate through the steps together to optimize your workflow and enhance your structural modeling experience.
Ensuring proper connectivity of analytical nodes in Revit is crucial for accurate structural analysis and seamless integration with analysis software. Properly connected nodes ensure the structural model accurately reflects the design, enabling precise simulations and reliable load transfer between elements. This reliability prevents analysis errors that could compromise the structure's safety. Additionally, correct connectivity facilitates smooth export to analysis tools like RISA-3D or RISAFloor, reducing the need for manual adjustments and troubleshooting, thus enhancing workflow efficiency.
This guide outlines the steps to:
Turn on Analytical Nodes
Create filters to identify node connectivity
Create a color-coded view of node connectivity
Adjust the location of Analytical Nodes
Open Visibility/Graphics Overrides:
Press [ V V ] on the keyboard to open the Visibility/Graphics Overrides window.
Ensure the Analytical Nodes box is ticked under the Analytical Model Categories.
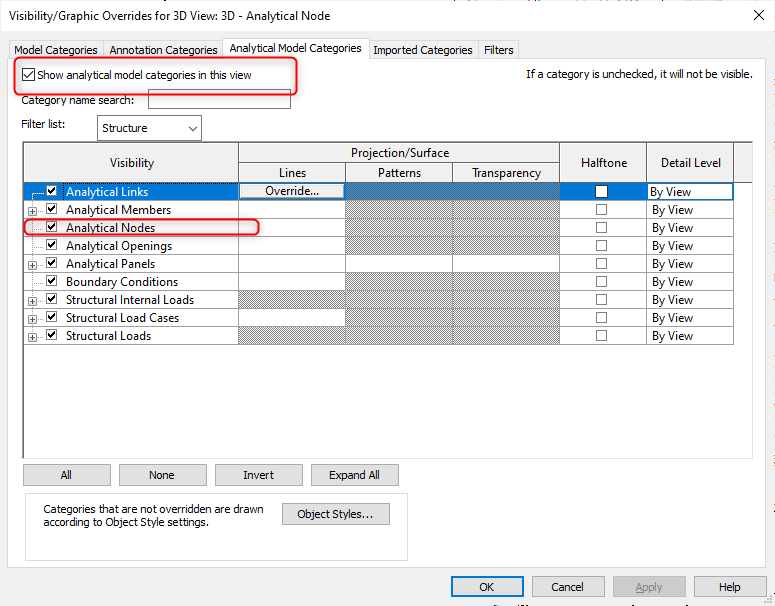
Make sure the Show analytical model categories in this view box is also ticked.
Click OK to apply the changes.
Isolate Analytical Model:
In the Model Categories, turn off the Show model categories in this view option to isolate only the analytical model.
This helps in focusing solely on the analytical nodes without the distraction of other model elements.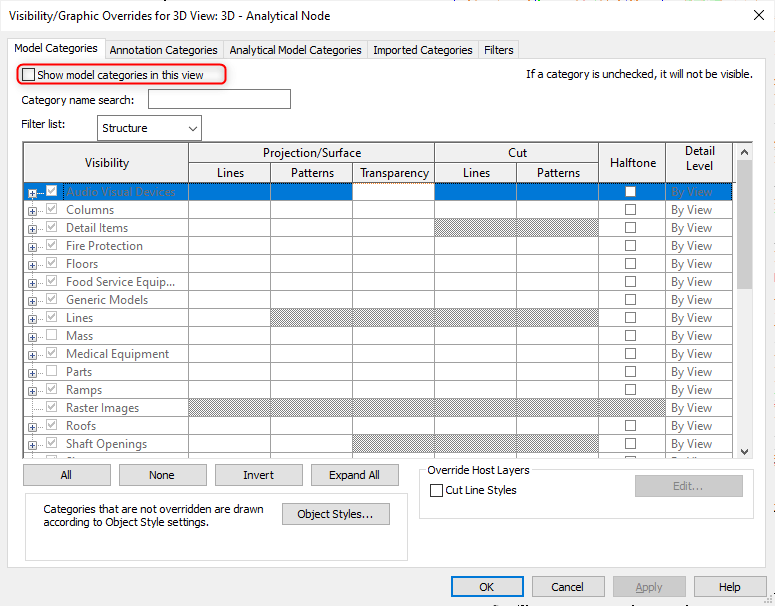
In the Visibility Graphics Overrides window, select the Filters tab and click on Edit/New.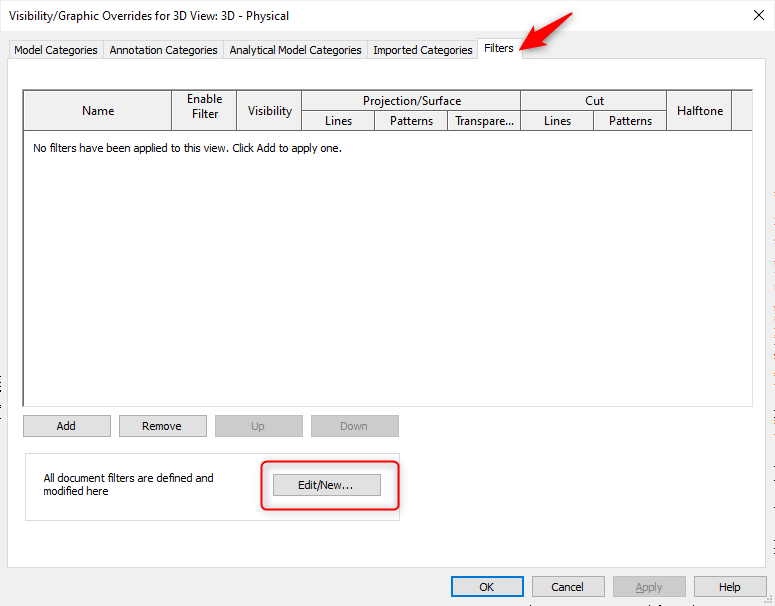
Create New Filter:
Click the New button and assign an appropriate name to your filter.
Under Categories, ensure Structure and Analytical Nodes are ticked.
In the Filter Rules, set the Filter by to Connection Status and match the values to the status used in your filter name.
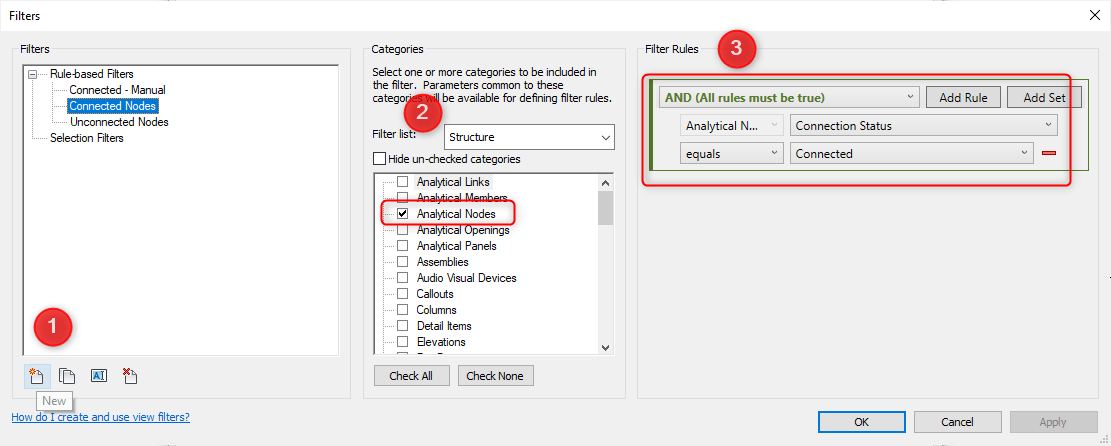
Example Filters:
Connected - Auto-detect: Nodes connected without edits.
Connected - Manual: User-edited nodes that are connected.
Unconnected: Nodes that are not connected.
Add Filters:
In the Filters window, click Add and select the filters you created. Hold CTRL to select multiple filters and click OK.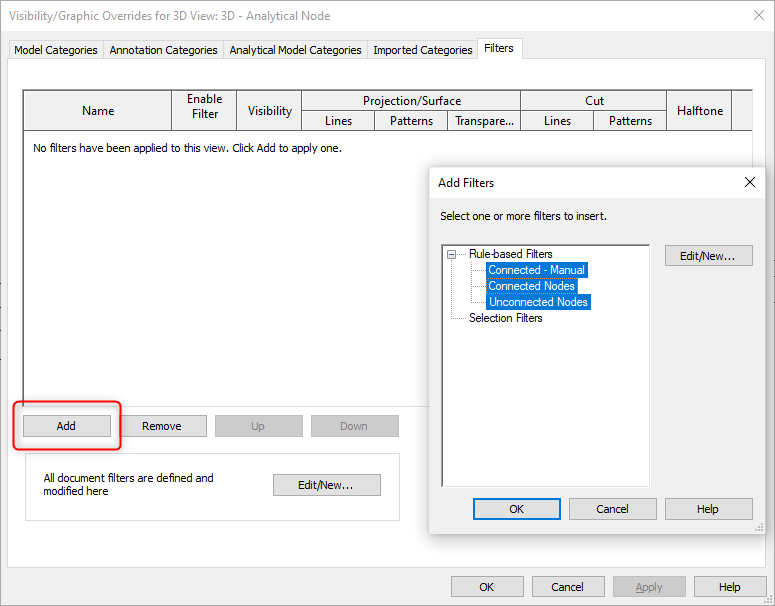
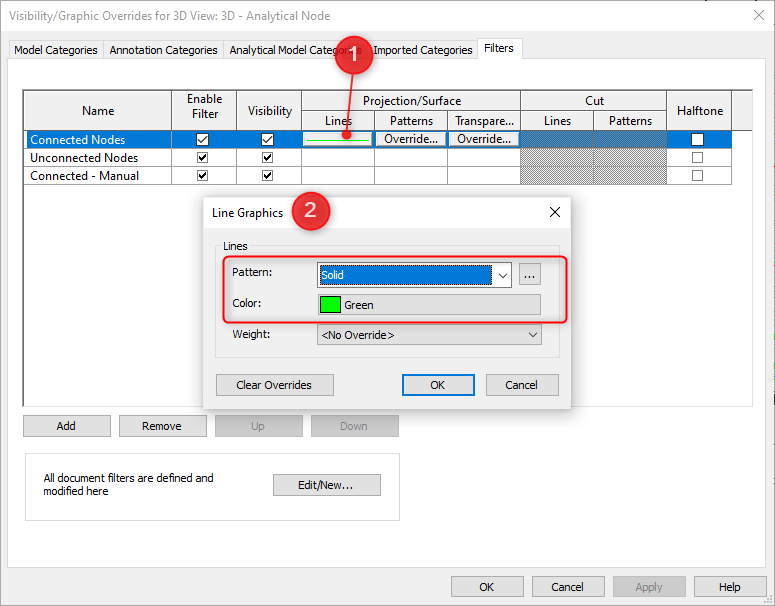
Set Colors:
Go to Editing Lines > Override and choose the colors for your filters. Ensure you pick the Solid pattern for clear visibility.
Click OK to apply the color settings.
Apply Changes:
Click Apply to see the changes in the background. Connected nodes will display in different colors based on their status.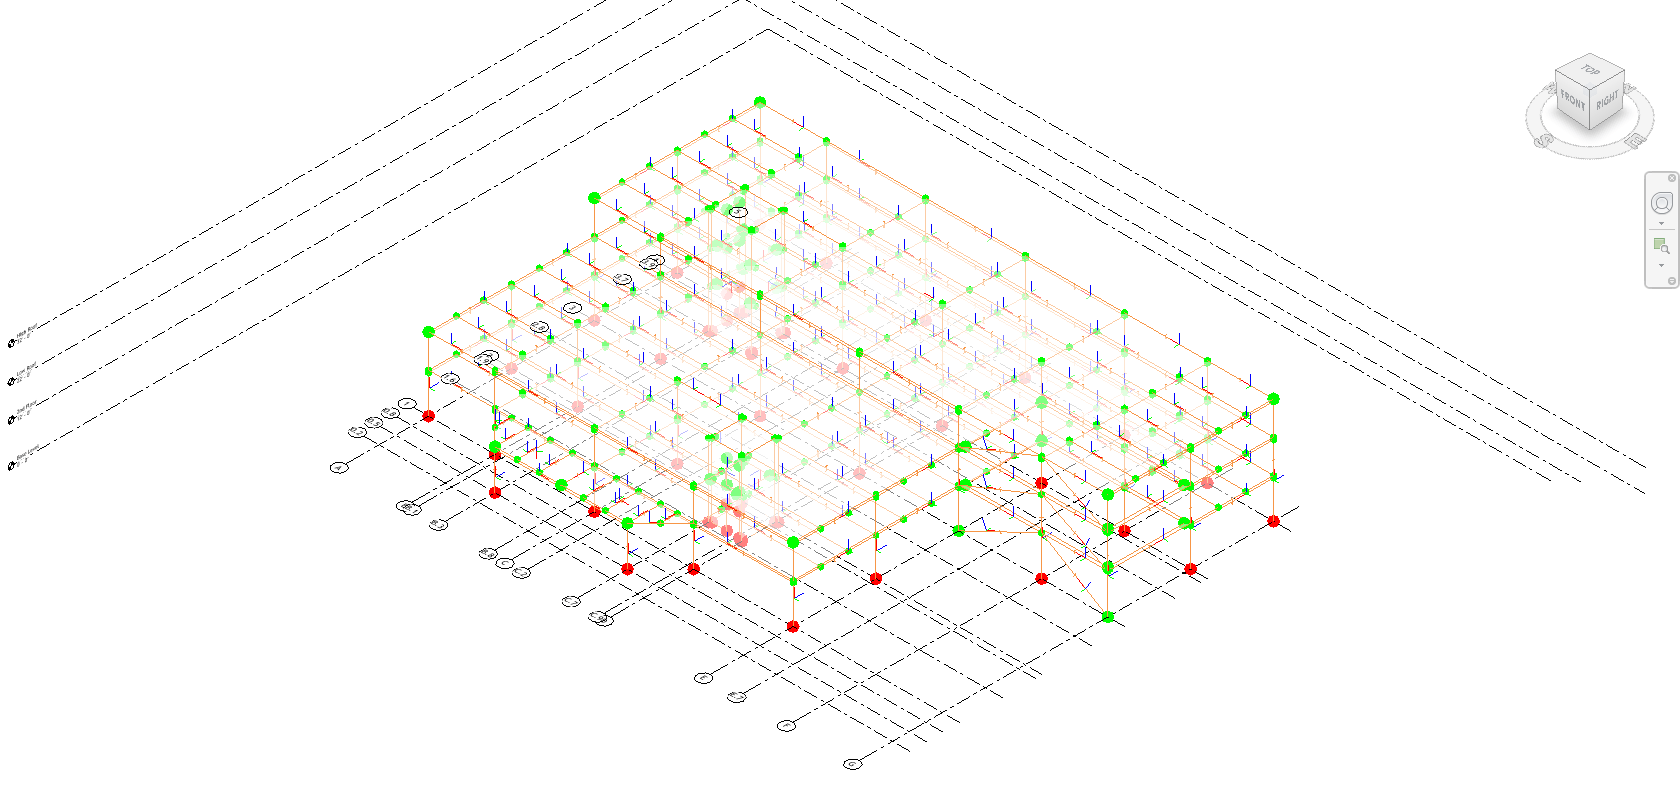
Using the color-coded filters, you can identify nodes that are not correctly connected. For example, red nodes may indicate unconnected nodes. Common issues might include:
Columns not meeting the floor level
Beam ends not meeting the columns
Bottoms of columns unsupported and unconnected
Edit Node Location:
Under Analyze > Modify, you can edit the location of the Analytical Nodes without affecting the graphical model.
Select the member, click and drag the node to the desired location, and click Finish to complete the adjustment.
For more information on the RISA-Revit Link, search our other support articles, videos, and content on risa.com. We also have a great handout for Tips & Tricks for the RISA-Revit link. Click the button below.

We're thrilled to announce the release of the RISA-Revit Link v24.0.2,...
Integrating structural models from RISA to Revit seamlessly can...

RISA is pleased to announce the release of the latest RISA-Revit Link...