


Importing Recorded Seismic Ground Motions
The Pacific Earthquake Engineering Research center (PEER) has a large...
Time history analysis solves for normal analysis results (joint displacements, member forces, code checks, etc.) based on loading that varies with time. For some analyses it may be useful to view an animation of the deflected shape of the structure as a function of time. This blog topic serves as a guide for users who doing this for the first time.
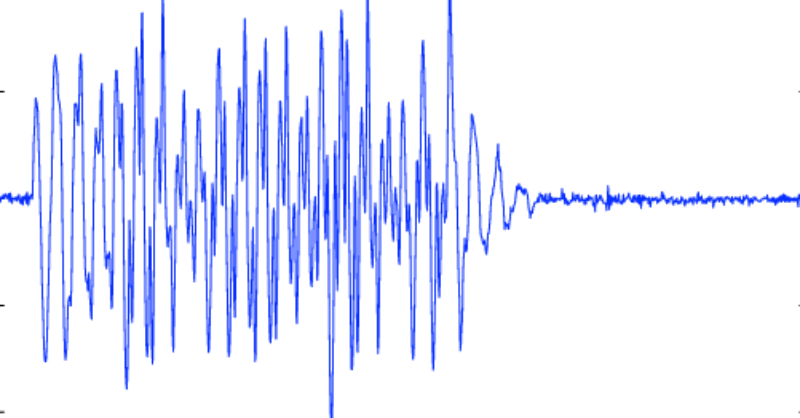
In this example, we’ll start with TH_Seismic_frame.r3d from the C:\RISA User Data\username\Model Files\Examples folder (Load Combination 3) which applies the North – South ground motion from the 1940 El Centro earthquake.
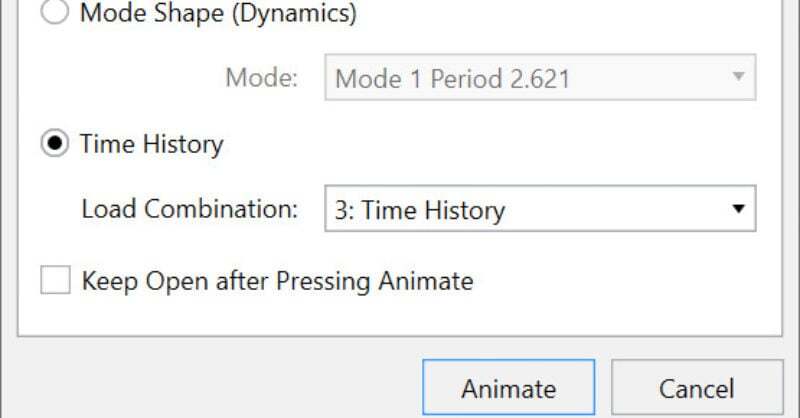
Navigate to the View tab and select Animate Results. Choose Time History and select the appropriate Load Combination.
Note: The static deflected shape can be plotted by selecting the load combination and then choosing the Time Step in the Deflection tab of the Results View Settings.


The new screen that pops up shows the animation of the deflected shape as a function of time. At the top of the screen you’ll find all the controls for this animation.
Note: The Speed Slider bar also controls the total duration of the movie if the user decides to export it to a WMV or MP4 file.
Adding a trace of the deflection or input force to the image can be informative. The trace is very useful because the user gets a visual feel for where the plot is within the overall time history motion and when maximum values can be expected.
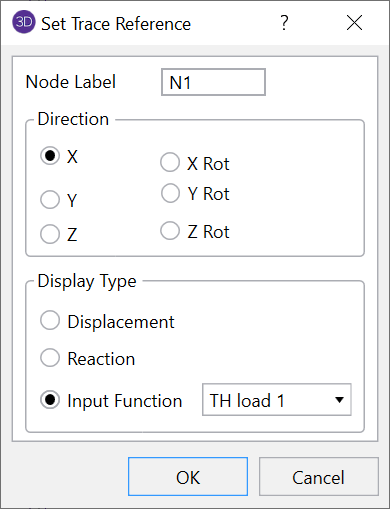
Click on the Trace button on the Animation Toolbar.
Type Joint Label “N1” in the X direction with the Input Function as the basis for the trace.
Select OK and a trace similar to that shown below will show up at the bottom of the screen.

Clicking the Export Animation button allows the user to choose between exporting the animation as an MP4 or a WMV file. Click on the video below for an example of what the Time History animation looks like.
The Pacific Earthquake Engineering Research center (PEER) has a large...
New in RISA-3D v14 is the introduction of a Time History analysis...
In structural engineering, a modal analysis uses the overall mass and...