


 By: Admin
How Do I Consider Welded Aluminum Connections in RISA-3D?
In Aluminum design, the welded areas have a decreased material strength...
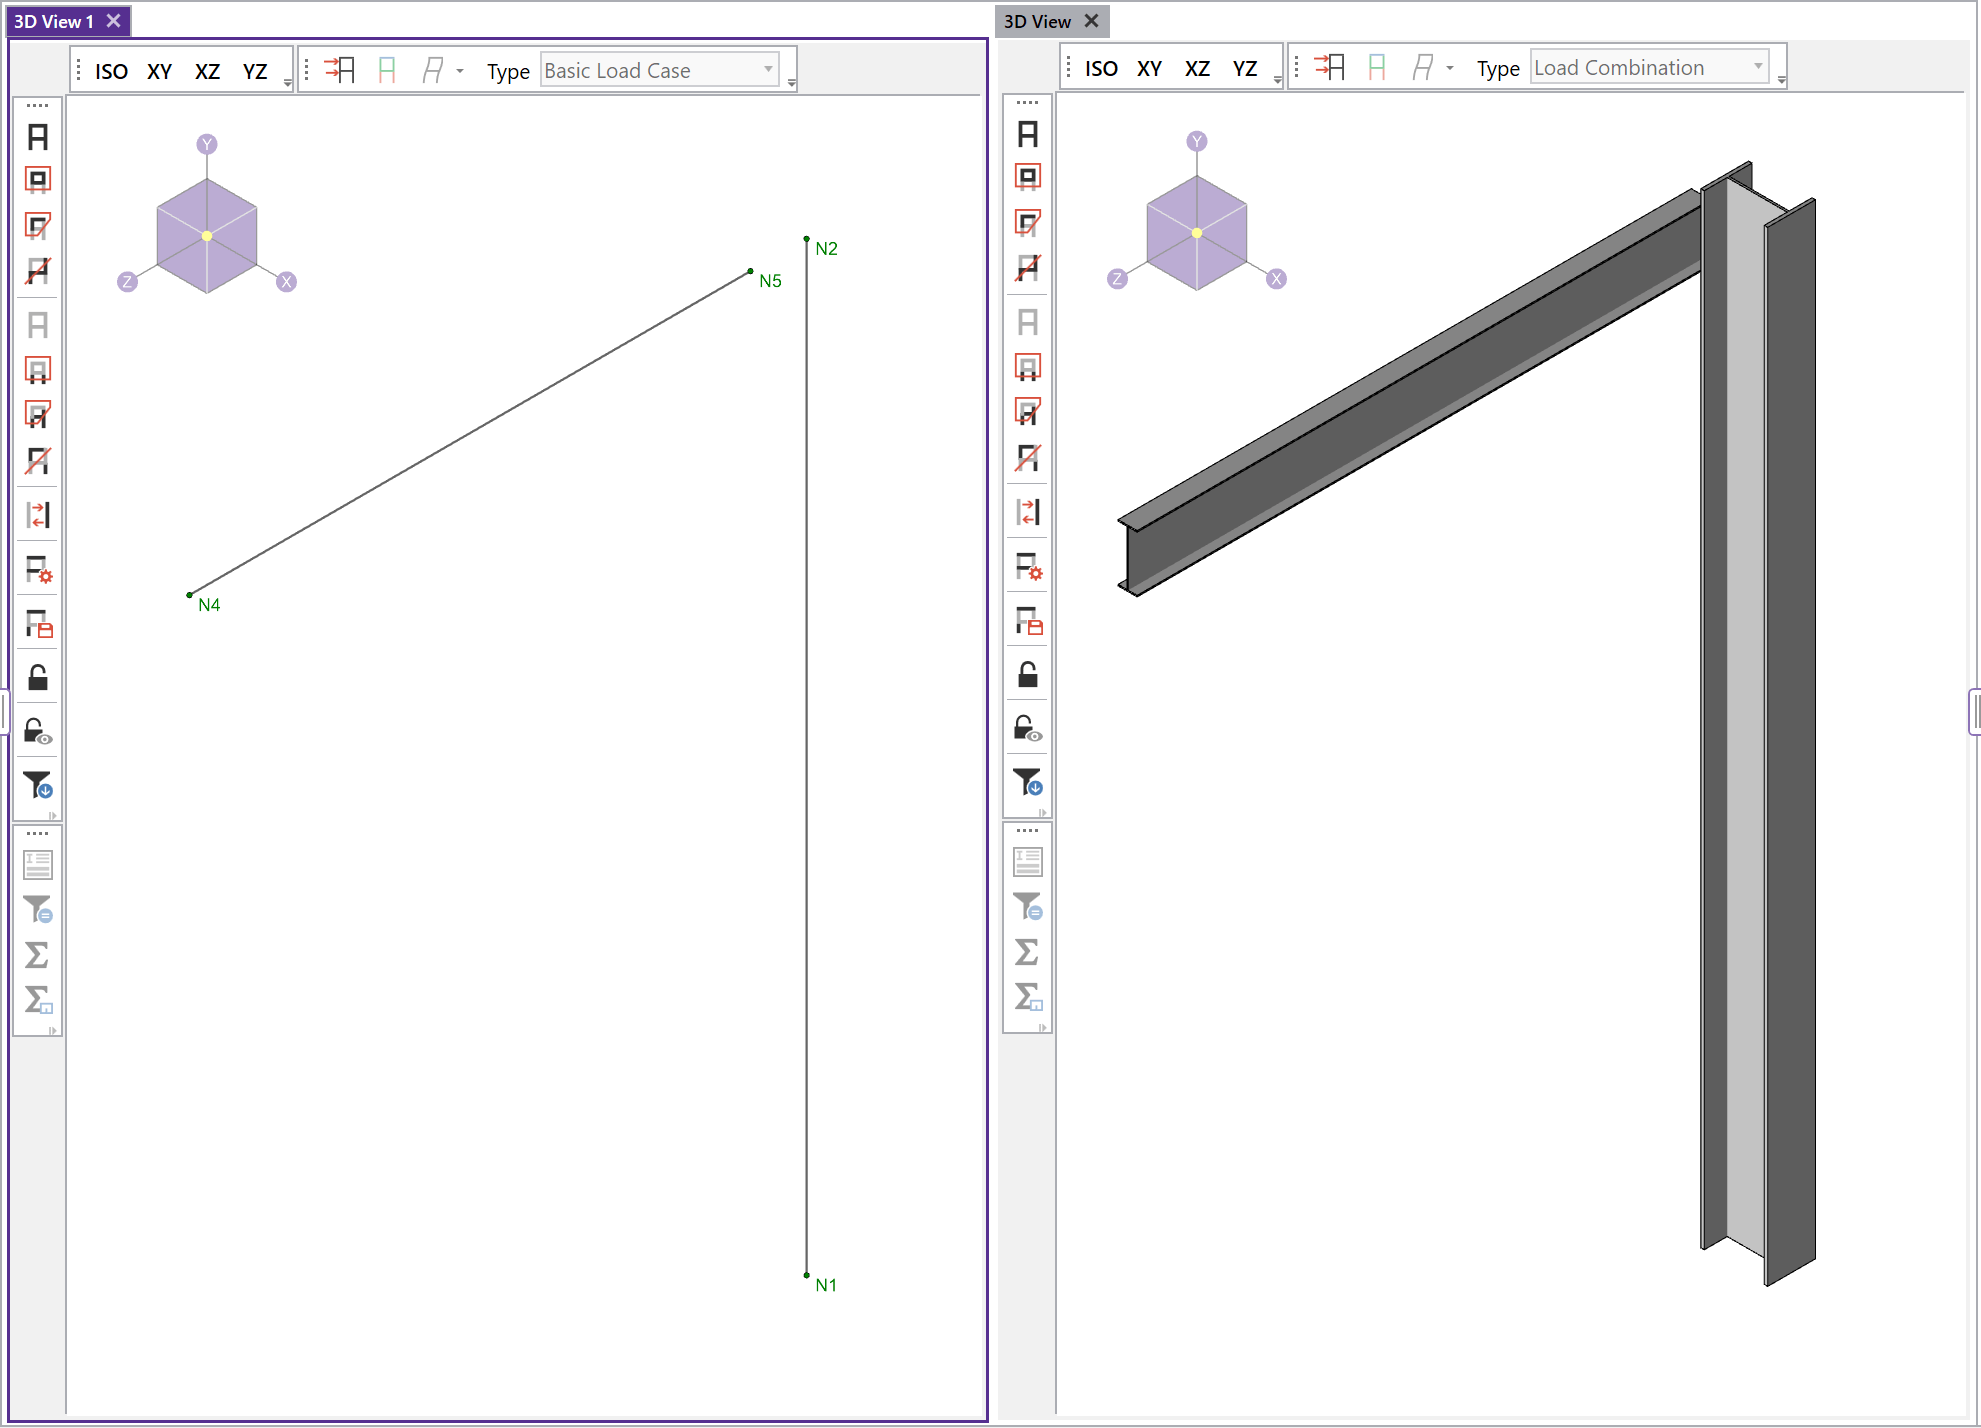
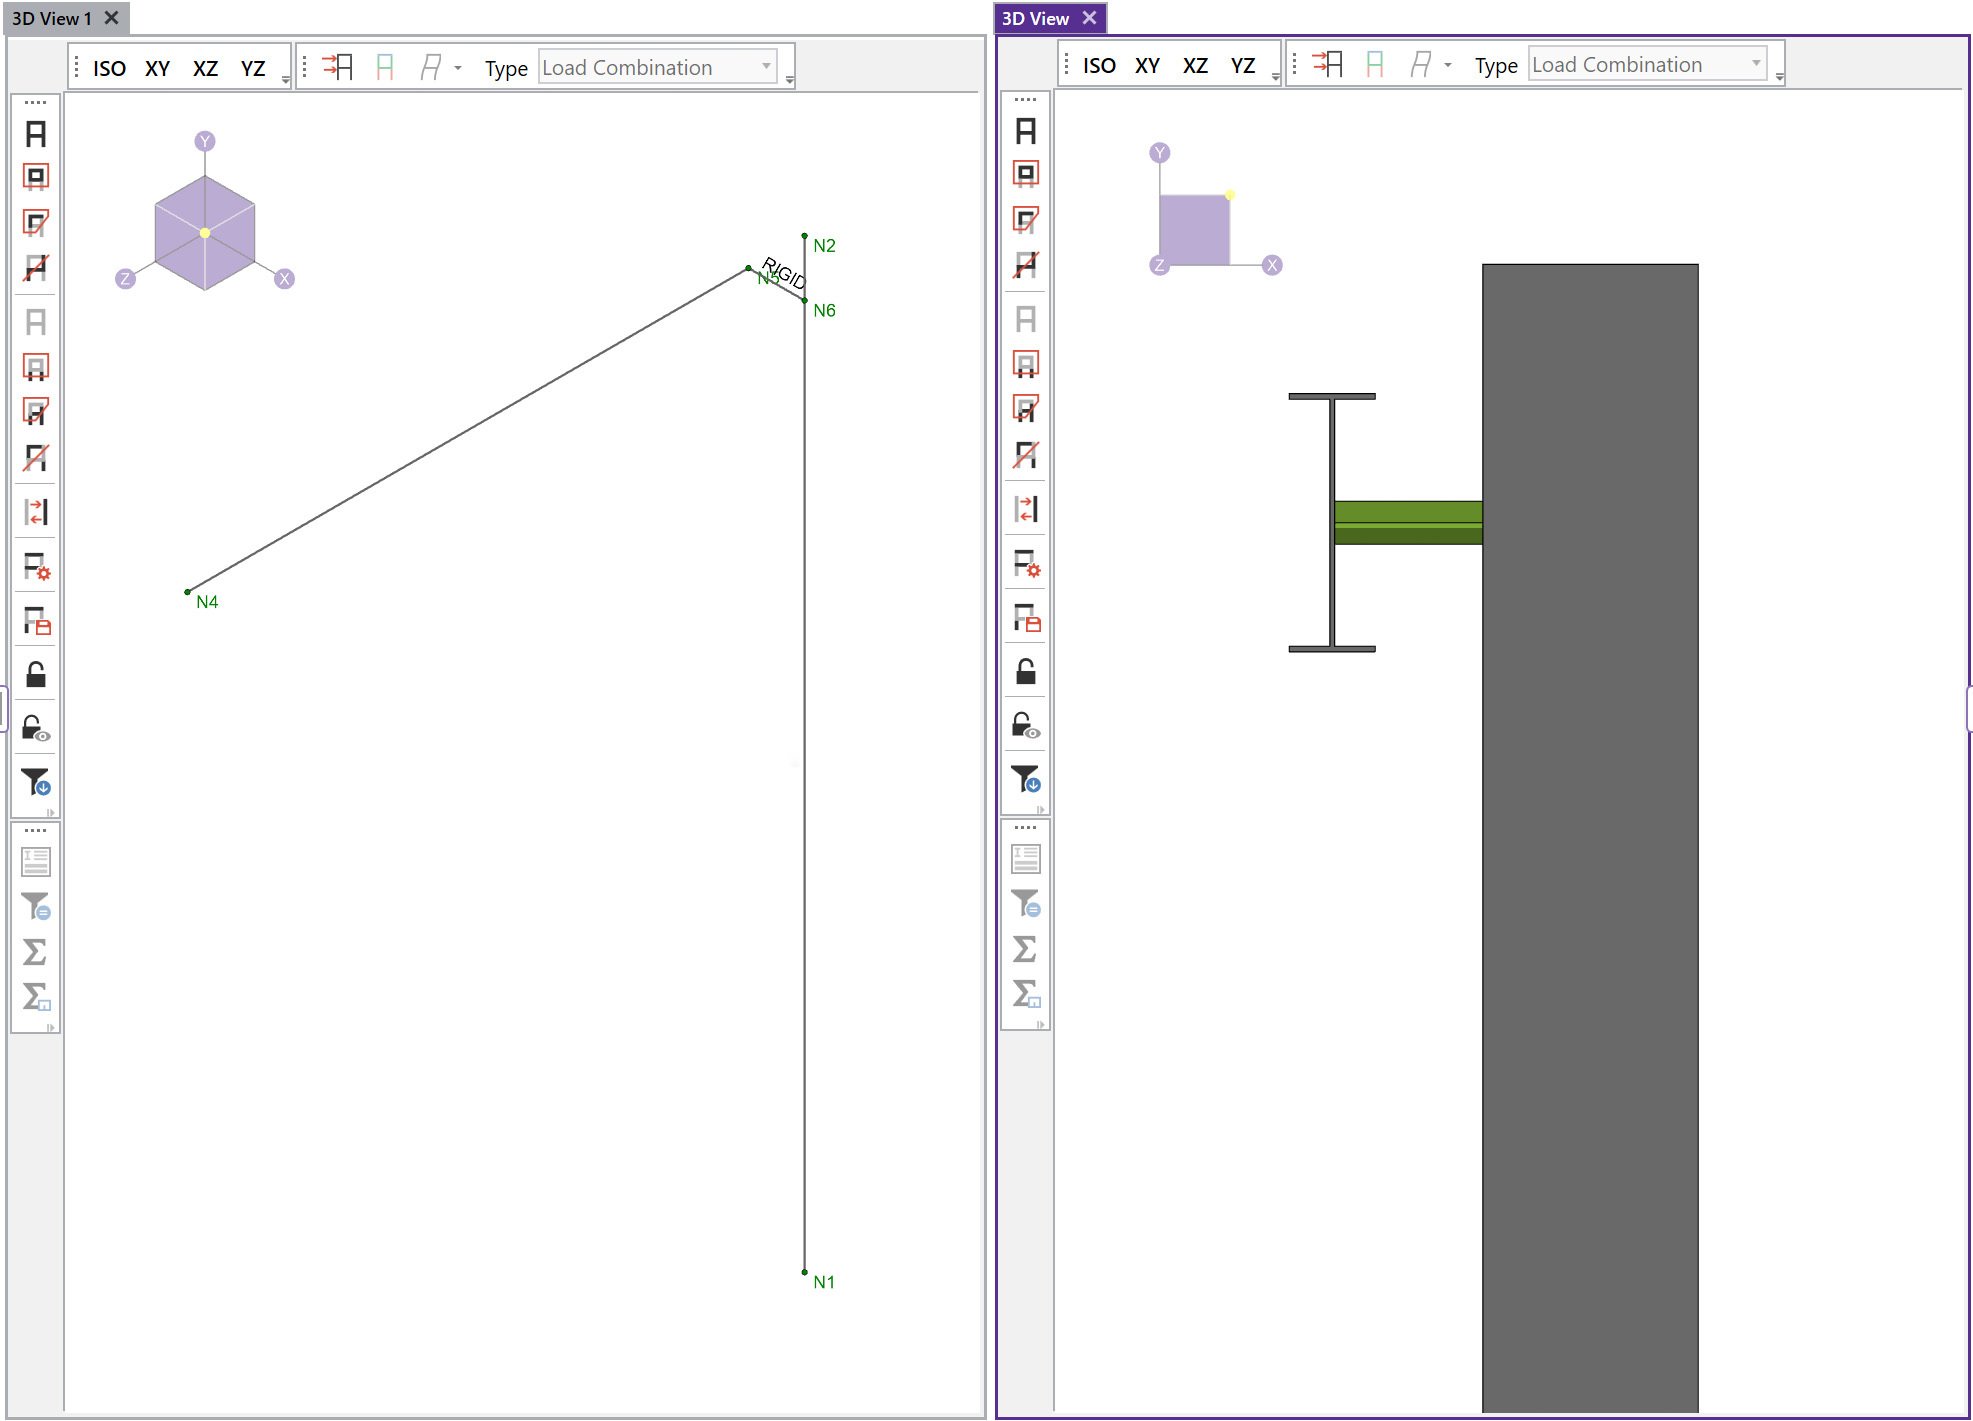
By default RISA-3D draws all members as line elements located at the centroid of the cross-section. However, connections between members are not always aligned with a member’s centroid. There may be horizontal or vertical offsets in the connection. To account for these you can add rigid links to create this eccentricity. More information about rigid links can be found in the following article:

Before proceeding with these offsets, ask yourself:
In many circumstances the answer to both of these questions is no. In such cases, it is not worth the extra modeling to obtain the minimal change in the analysis results. However, if the eccentricity causes a significant effect to the analysis then you may want to account for the eccentricities. This decision is up to your engineering judgment.
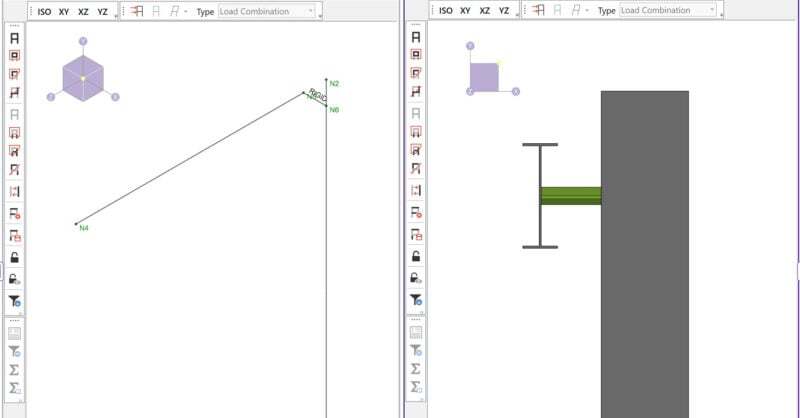
For example, below a beam is offset from a column and is supported on a haunch off of the column flange. The approach is simple:
In Aluminum design, the welded areas have a decreased material strength...
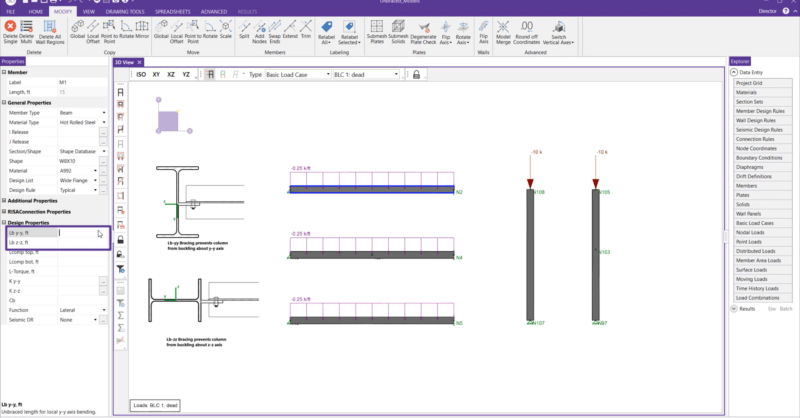
In this video, learn about the various unbraced length parameters that...
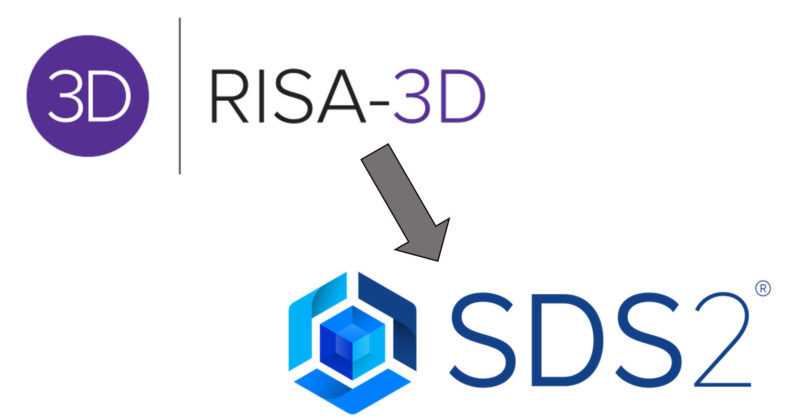
Version 20.0.2 allows users to integrate models between RISA-3D and...