


 By: Admin
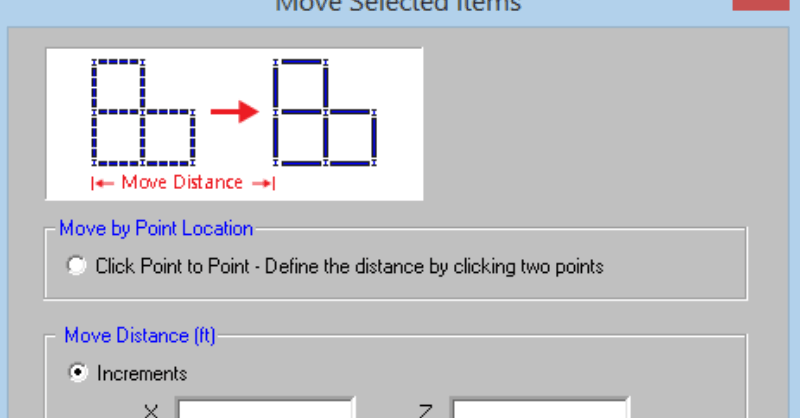
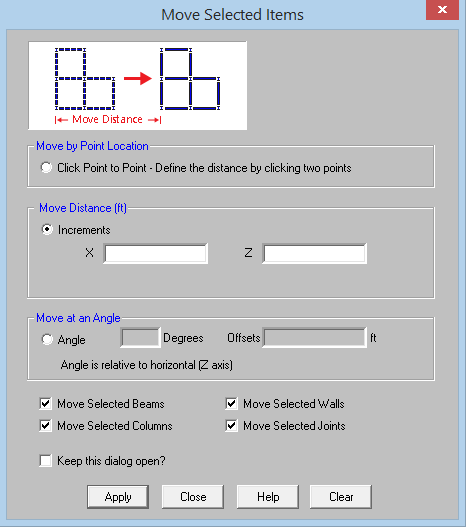
RISAFloor v11 includes the ability to re-position selected elements such as beams, columns, walls, and nodes in your model. On the Graphic Editing Toolbar, click on the Move Selected Items button to open the Move Selected Items dialog box.
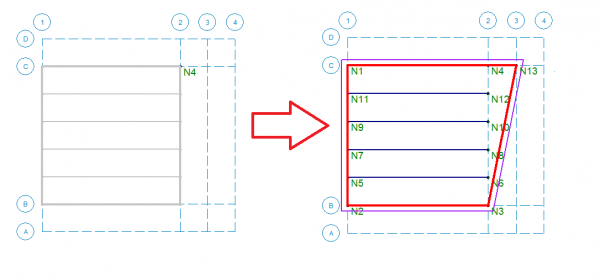
Move by Point Location option allows the user to click on the first point and then click on the second point to define the distance to move the selected items. In the example below, the Move by Point Location option is selected. With N4 highlighted, the first click is on N4 and then the second click is on project grid line C3, which modes the wall panels associated with that end node. The beam ends did not move because their end nodes were not selected. In this case, a good option is to use the Trim and Extend tools to clean up any framing discontinuities.
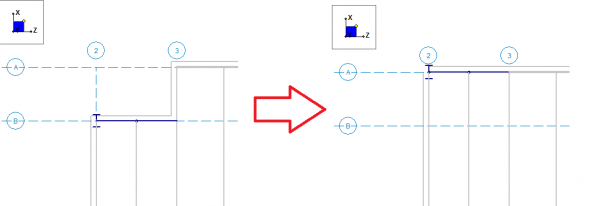
Move Distance lets you to enter in the increments for the distance entered in the X and Y directions. For example in the below image, the selected beam and column are moved by entering in a distance of 10’ in the X direction. When elements such as beams and walls are moved, the end joints associated with them move as well. If the joint is also shared by a column, that column will move along with everything attached to the column.
Move at an Angle selection will move the selected elements at an angle from the horizontal axis by an offset distance both entered by the user. For example, in the model below, the three selected columns and their nodes are moved at an angle of 45 degrees from horizontal and offset by five feet. This also repositions the beams connected to those columns because that column node is also associated with the beam end node.


SEPTEMBER 06, 2018
Read More
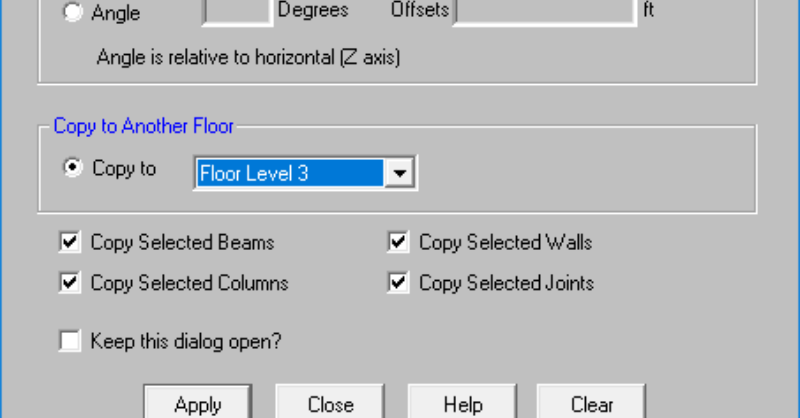
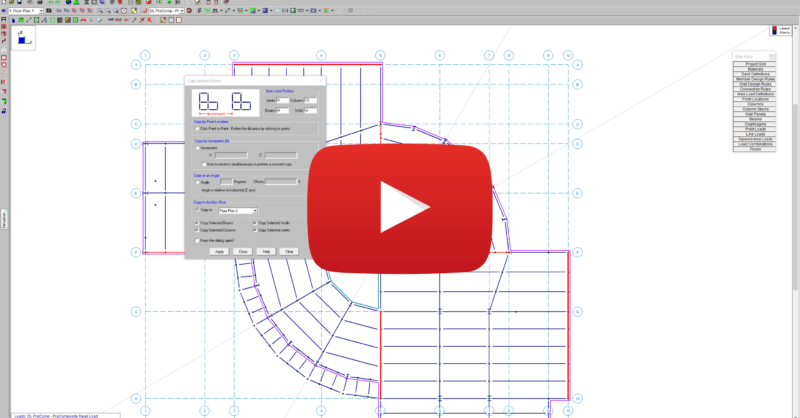
Copy Elements from Floor to Floor
RISAFloor v13.0 now includes the added ability to graphically copy...
OCTOBER 04, 2018
Read More
Drawing Grid and Other Modeling Improvements
RISAFloor v13 includes a variety of modeling features which allows...