


 By: Admin
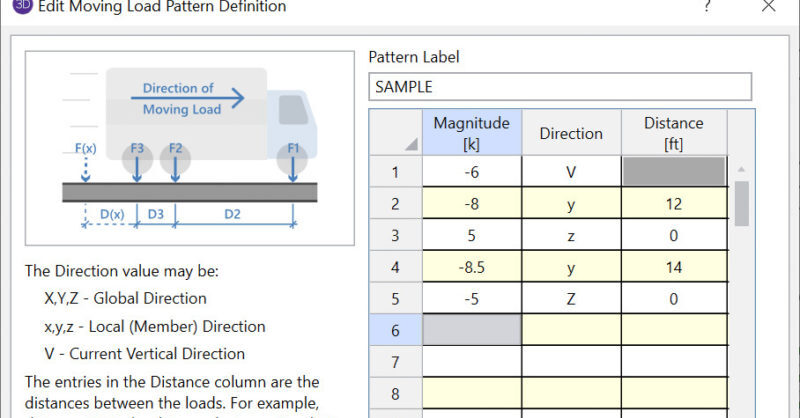
How to Add a New Pattern to the Moving Load Database
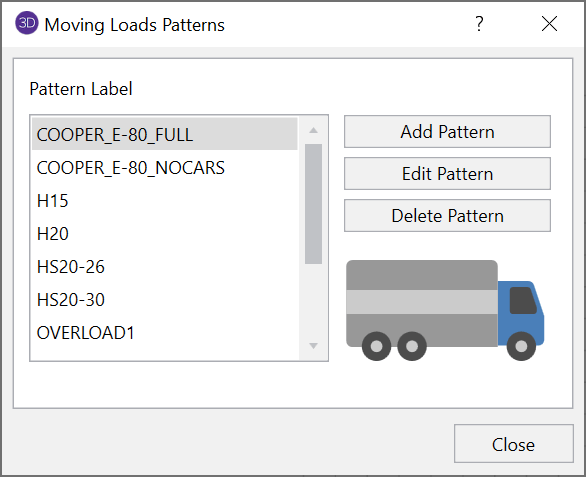
RISA-3D and RISA-2D come with a default list of existing moving load...
RISA-3D and RISA-2D will allow you to add a moving load pattern to your model and include it in your envelope solution.
To learn about adding new moving load patterns to your Moving Load Patterns library, please see the How Can I Add a New Pattern to the Moving Load Database blog.

Once you have added your moving load pattern, you can apply it to your model in the Moving Loads spreadsheet (Spreadsheet > Loads > Moving Loads).
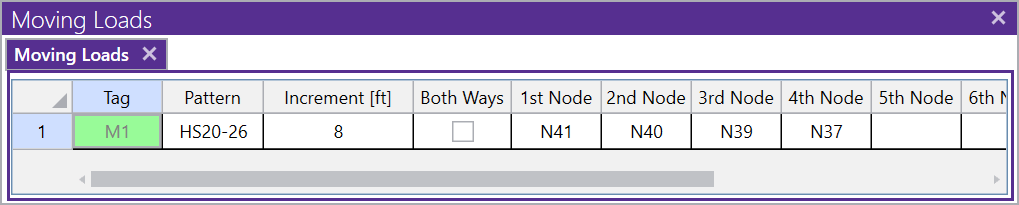
In this spreadsheet, you will define the following:
Note: You may skip intermediate points along a straight line when specifying the path.
Once you have defined your moving load, you can include it in your load combinations through the Load Combinations spreadsheet (Home tab > Load Combinations).
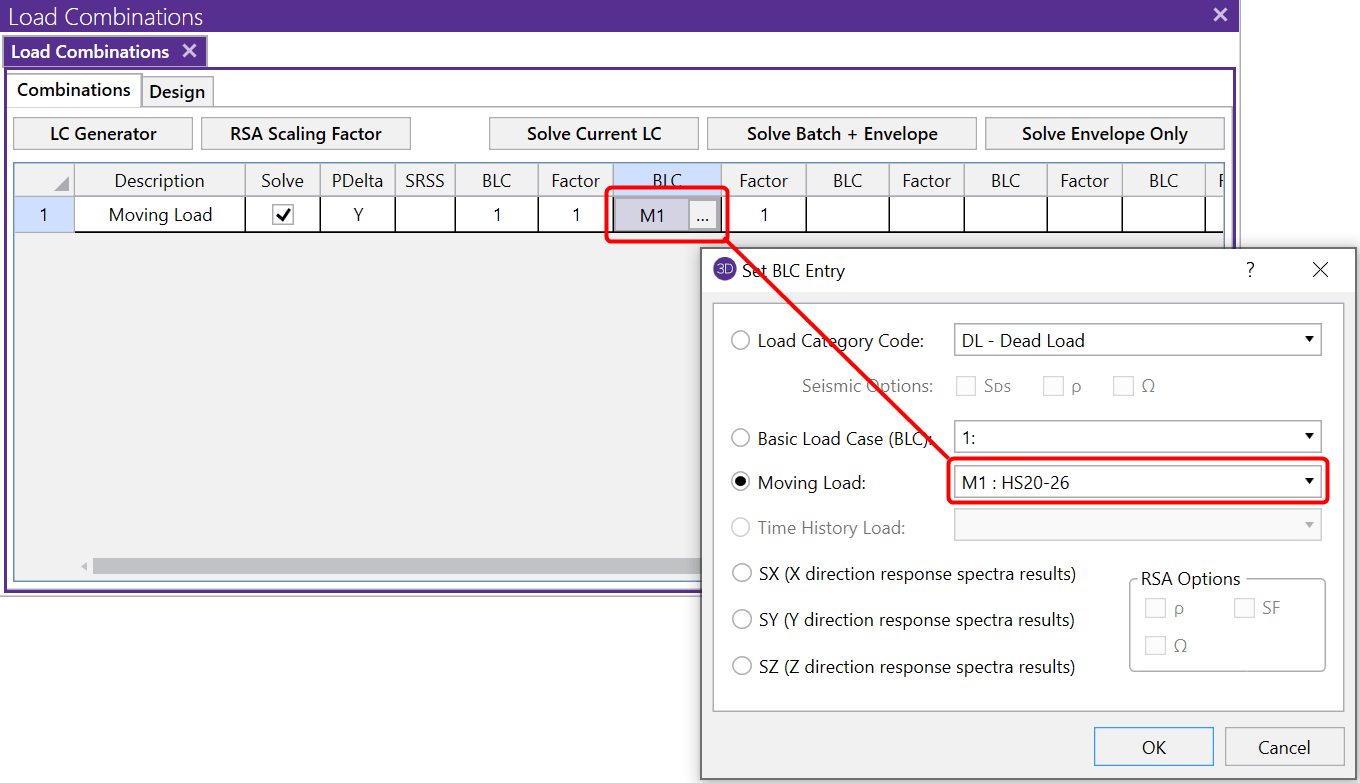
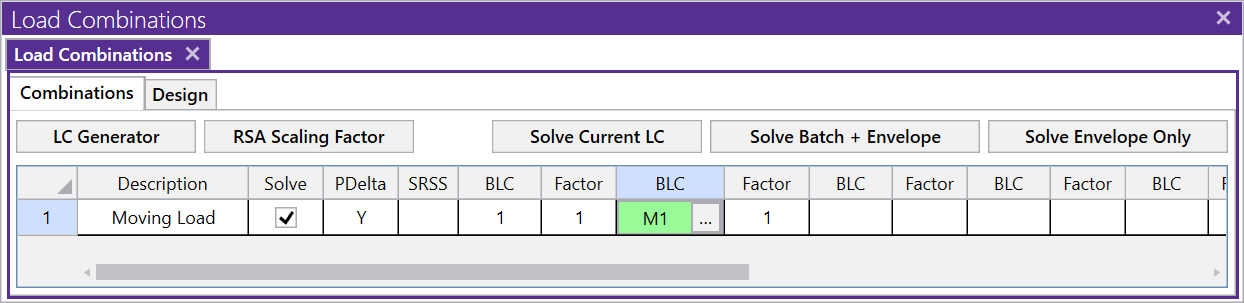
Note: When a moving load is included in the solution, it will automatically run as an Envelope solution. This is because a moving load solution includes so much information; the output has been simplified down to just the max and min values.
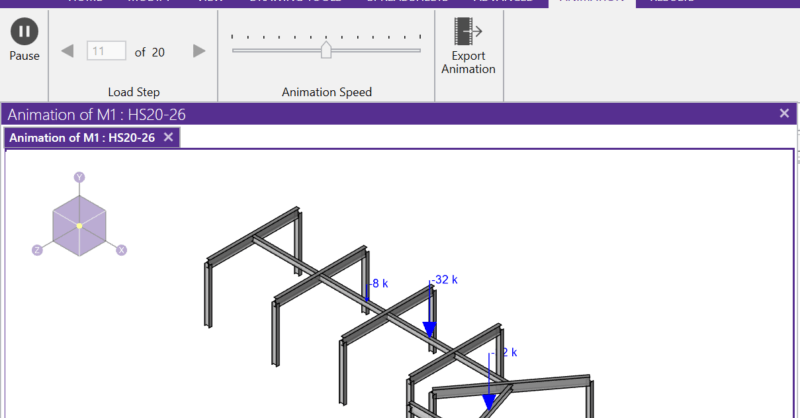
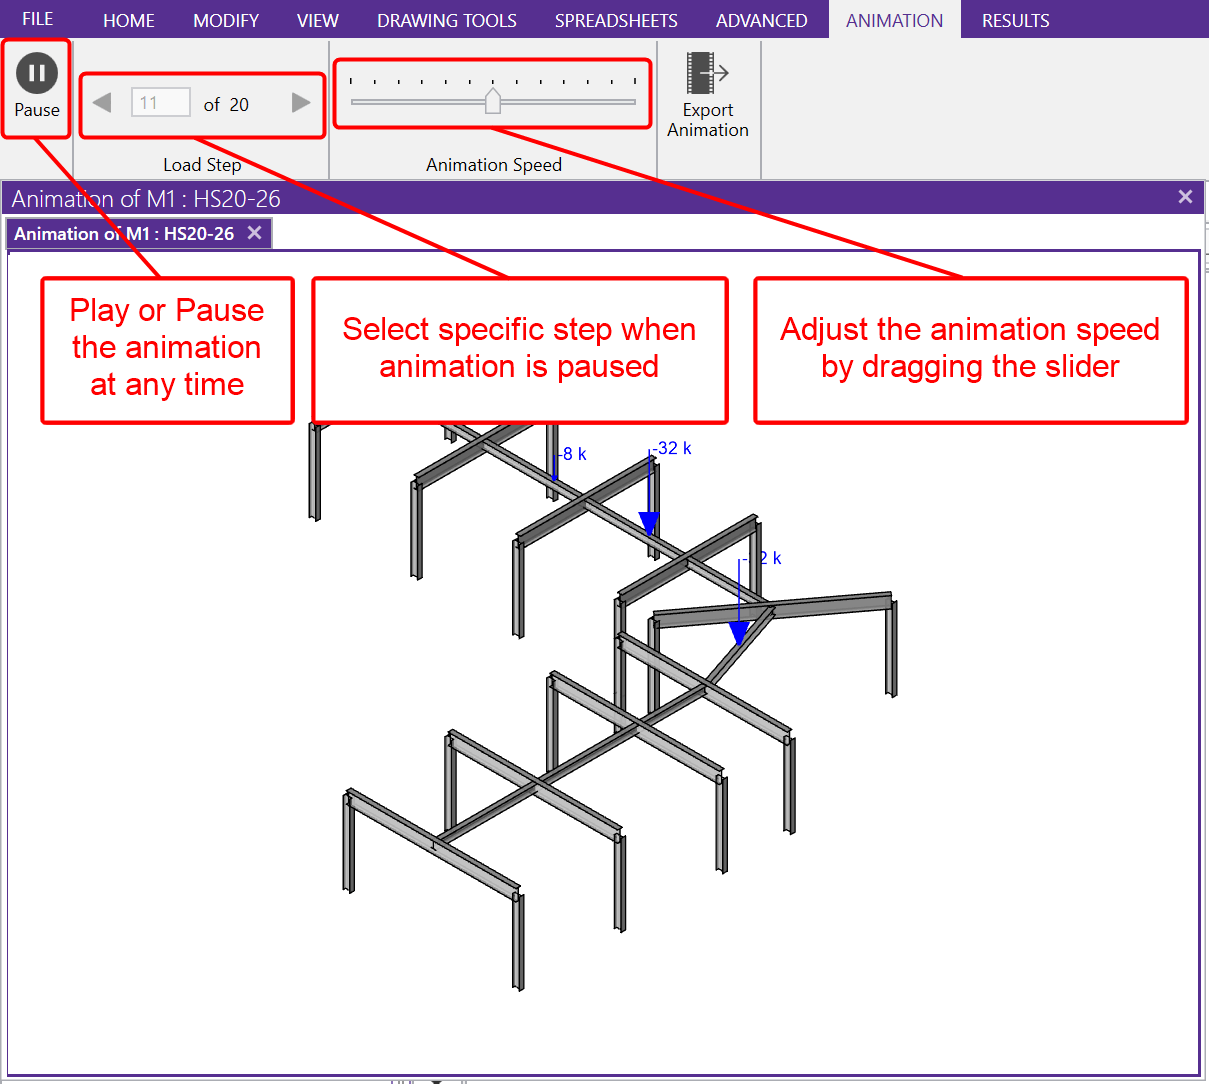
Before solving you can graphically verify the moving load using the 'Animate Moving Loads' option in the View toolbar.

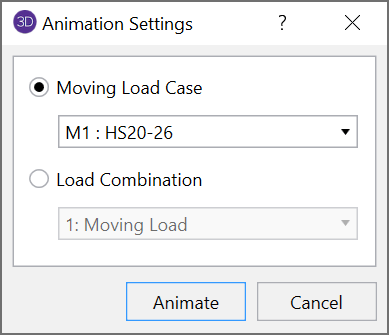
This will open a new 3D view with the moving load now animated and the animation controls.
RISA-3D and RISA-2D come with a default list of existing moving load...

RISA-3D, RISA-2D and RISAFloor have the capability to project...
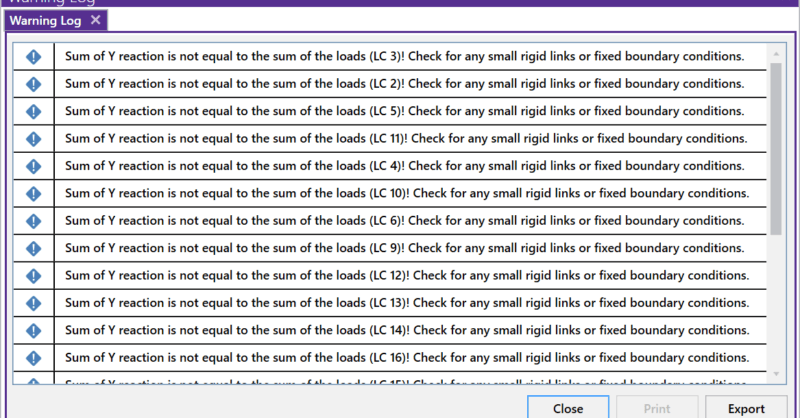
RISA-3D will now check your model for errors by summing the reactions...